 Skip to content
Let’s talk about a topic that might not be the most glamorous but is essential for every homeowner: roofing problems. We all know that Texas weather can be quite unpredictable, and unfortunately, our roofs bear the brunt of it. From leaks and missing shingles to pesky critters finding their way in, roofing issues can be a real headache. But fret not! Authentic Roofing LLC has created this guide, we’ll discuss the most common roofing problems in Plano and provide you with practical tips on how to address them. So, grab a cup of coffee, sit back, and let’s tackle those roofing woes together!
Roof Leaks: Locating and Repairing the Source of Water Intrusion
Roof leaks can be frustrating and potentially damaging to your home. Locating and repairing the source of water intrusion is essential to prevent further damage. Here’s a step-by-step guide to help you in this process:
- Safety first: Before inspecting your roof, ensure you take proper safety precautions. Use a sturdy ladder, wear non-slip shoes, and if possible, have someone assist you.
- Interior inspection: Start by examining the interior of your home for any signs of water intrusion. Look for water stains, discoloration, peeling paint, or mold growth on ceilings, walls, and around windows. Note the location of these signs as they can provide clues about the source of the leak.
- Exterior inspection: Once you’ve identified potential leak locations inside, it’s time to inspect the roof from the outside. Look for missing or damaged shingles, cracked flashing, clogged gutters, or any other visible signs of damage. Pay close attention to areas where different materials or structures intersect, such as chimneys, vents, skylights, or dormers, as these are common leak-prone areas.
- Attic inspection: If you have access to your attic, inspect it for any signs of water intrusion. Look for wet or damp insulation, water stains on rafters or plywood, or signs of mold growth. Follow the trail of any water stains to help identify the point of entry.
- Test with water: If you’re unable to identify the source of the leak visually, consider using a garden hose to simulate rainfall. Start from the lowest point of the roof and gradually work your way up, thoroughly wetting each section while having someone inside monitoring for any signs of water penetration. This method can help pinpoint the exact location of the leak.
- Address common leak sources: Based on your inspections, focus on common areas where leaks occur. Repair or replace damaged or missing shingles, fix cracked or damaged flashing around chimneys or vents, and clear clogged gutters and downspouts. Additionally, seal any gaps or cracks in the roof or around structures using appropriate roofing sealant.
- Consult professionals: If you’re unable to locate or fix the source of the leak, or if the damage is extensive, it’s recommended to consult professional roofers. They have the expertise, tools, and experience to identify and repair roof leaks effectively.
Remember, safety should always be a priority, and if you’re uncomfortable working on the roof or unsure about the repair process, it’s best to seek professional help. Regular roof maintenance, inspections, and timely repairs can help prevent leaks and prolong the life of your roof.
Missing or Damaged Shingles: Replacing and Maintaining Roofing Materials
Replacing and maintaining roofing materials, such as missing or damaged shingles, is crucial for the long-term integrity of your roof. Here’s a guide to help you with this process:
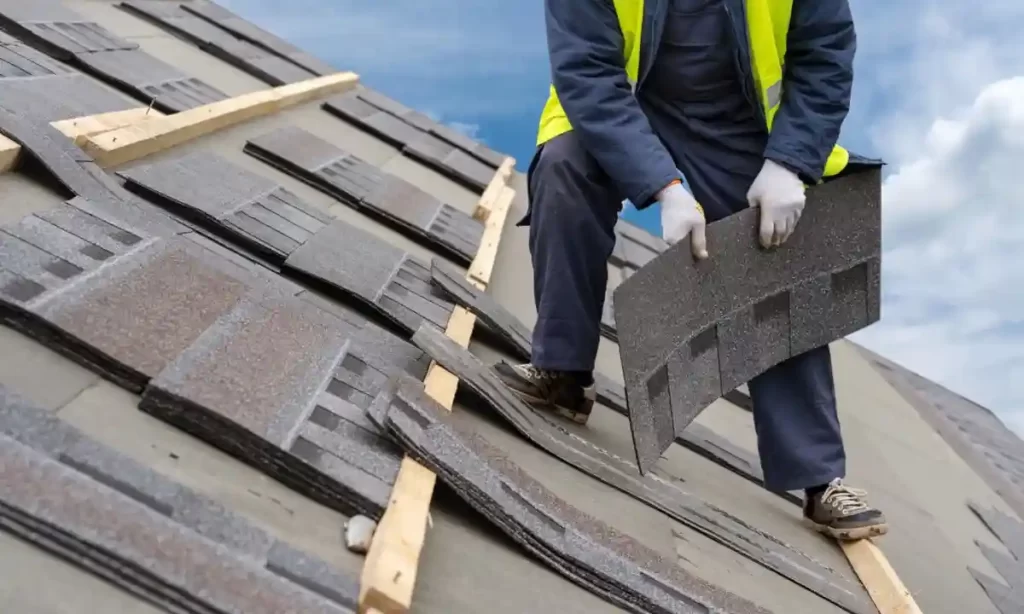
- Assess the damage: Inspect your Residential Roofing to identify missing or damaged shingles for your home. Look for signs of curling, cracking, blistering, or any shingles that have come loose or detached from the roof. Note the extent of the damage and make a list of the shingles that need replacement.
- Gather supplies: Before you start the repair, gather all the necessary supplies. You’ll typically need replacement shingles (preferably of the same type and color as your existing shingles), roofing nails, a hammer, a pry bar, a utility knife, and roofing cement or adhesive.
- Safety precautions: Prioritize safety by using a sturdy ladder and wearing appropriate safety gear, including non-slip shoes and gloves. Avoid working on the roof during adverse weather conditions or when it’s wet or slippery.
- Remove damaged shingles: Begin by carefully lifting the edges of the damaged shingles using a pry bar or the claw end of a hammer. Take care not to damage neighboring shingles in the process. Once you’ve lifted the damaged shingle, remove the roofing nails holding it in place and completely detach it from the roof.
- Prepare the area: Clean the area where the damaged shingle was located. Remove any debris, loose nails, or old adhesive. Ensure the surface is clean and smooth to ensure proper adhesion of the replacement shingle.
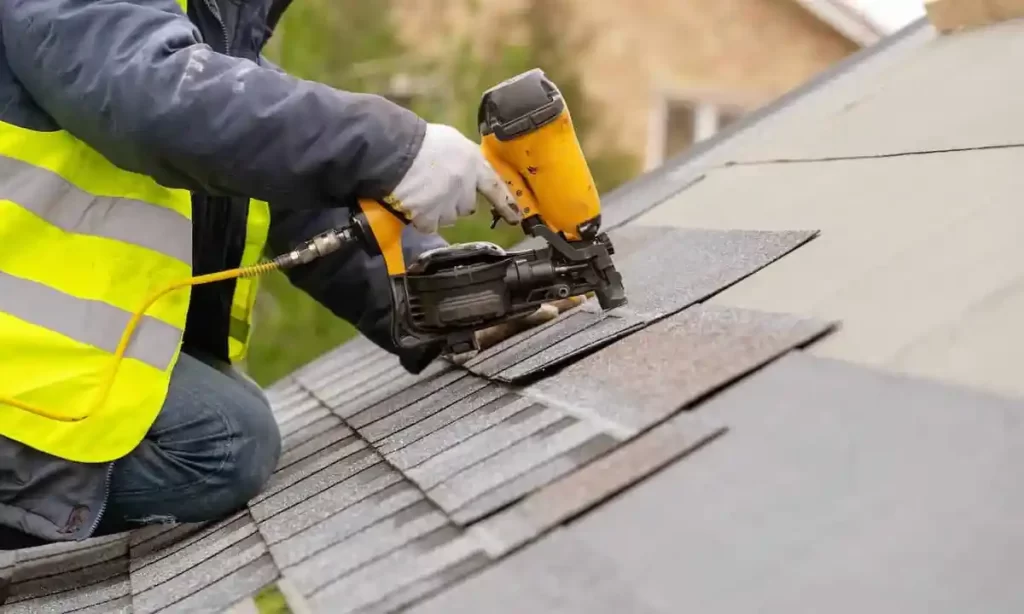
- Install the replacement shingle: Slide the new shingle into the empty space, aligning it with the neighboring shingles. Ensure it sits flat and snugly in place. Use roofing nails to secure the shingle, placing them in the designated nail line just above the shingle’s adhesive strip. Hammer the nails gently, taking care not to damage the shingle or surrounding ones.
- Seal and secure: Apply roofing cement or adhesive underneath the edges of the neighboring shingles to create a secure bond. Press down firmly on the replacement shingle to ensure it adheres properly. Wipe off any excess adhesive or cement.
- Inspect and maintain: After replacing the damaged shingle, step back and inspect your work. Ensure the new shingle blends well with the surrounding ones and lies flat on the roof. Periodically inspect your roof for any further damage or signs of wear and address them promptly to prevent larger issues.
Regular roof maintenance is essential to extend the lifespan of your roof and prevent further damage. Consider conducting annual inspections, cleaning out gutters, and addressing any issues promptly. If you’re unsure about the repair process or have extensive damage, it’s advisable to consult a professional roofing contractor.
Roof Ventilation Issues: Improving Airflow and Preventing Moisture Buildup
Proper roof ventilation is crucial for maintaining a healthy and durable roof. It helps to improve airflow, regulate temperature, and prevent moisture buildup in the attic. Here are some steps to address roof ventilation issues:
- Assess your current ventilation: Start by evaluating the existing ventilation system in your attic. Check for the presence and condition of intake vents (typically located along the eaves or soffits) and exhaust vents (such as ridge vents, gable vents, or roof vents). Ensure they are not obstructed by insulation, debris, or other materials.
- Calculate ventilation requirements: Determine the ventilation requirements for your specific roof by considering factors such as the size of the attic space and the climate in your area. As a general rule of thumb, you should aim for a balanced ventilation system that provides approximately 1 square foot (0.09 square meters) of ventilation for every 150 square feet (14 square meters) of attic space.
- Install intake vents: If your attic lacks sufficient intake vents, consider installing soffit vents or other types of intake vents. These vents allow fresh air to enter the attic from the outside. Ensure they are evenly distributed along the eaves to facilitate proper airflow.
- Ensure clear pathways: Check that there are clear pathways for air to flow from the intake vents to the exhaust vents. Remove any insulation, debris, or obstructions that may hinder the airflow. Keep in mind that baffles or chutes may be necessary to maintain a clear path if you have insulation in the attic.
- Install exhaust vents: Ensure that you have adequate exhaust vents to allow hot air and moisture to escape from the attic. Ridge vents, roof vents, or gable vents are commonly used for this purpose. These vents should be evenly distributed across the roof to provide efficient airflow.
- Consider mechanical ventilation: In some cases, especially if natural ventilation is insufficient, you may need to install mechanical ventilation systems such as powered attic fans or whole-house ventilators. These devices can help improve airflow and control moisture levels in the attic. Consult with a professional to determine if this is necessary for your specific situation.
- Insulate properly: Proper insulation is crucial for maintaining a healthy attic environment. Ensure that insulation materials are installed correctly and do not block airflow from the intake vents. Consider using insulation baffles to create a gap between the insulation and the roof deck, allowing air to flow freely.
- Regular maintenance: Once you’ve addressed ventilation issues, it’s important to perform regular maintenance. Inspect your vents periodically to ensure they are free from debris or blockages. Clear out gutters and downspouts to prevent water accumulation on the roof.
By improving roof ventilation, you can enhance the lifespan of your roof, prevent moisture-related issues, and promote energy efficiency. If you’re unsure about the specific ventilation requirements or need assistance, consult with a professional roofing contractor or an expert in building ventilation.
Animal Infestations: Safely Removing and Preventing Critter Intrusions
Dealing with animal infestations can be challenging, but it’s important to address them promptly to prevent damage and maintain a safe environment. Here are some steps to safely remove and prevent critter intrusions:
- Identify the infestation: Determine the type of animals causing the infestation. Common culprits include squirrels, raccoons, birds, bats, rodents, or insects. Identifying the species will help you choose the appropriate removal and prevention methods.
- Assess the extent of the problem: Determine the entry points and the scale of the infestation. Inspect your home, including the roof, attic, walls, and foundation, for signs of animal activity such as nests, droppings, chewed wires or insulation, or structural damage. Note the areas that need attention.
- Seek professional help if needed: If the infestation is severe, involves dangerous animals (e.g., venomous snakes), or requires specialized knowledge, it’s advisable to contact professional wildlife removal services. They have the expertise and equipment to handle complex infestations safely and humanely.
- Seal entry points: Once you’ve removed the animals, it’s crucial to prevent future intrusions by sealing off their access points. Inspect the exterior of your home for gaps, cracks, or openings and seal them properly. Pay attention to areas around pipes, vents, chimneys, and utility openings. Use materials like steel mesh, caulk, or expanding foam to block potential entry points.
- Trim trees and vegetation: Overhanging branches and dense vegetation near your home can provide easy access for critters. Trim tree branches and shrubs to keep them away from your roof or walls. This reduces the chances of animals gaining access to your home.
- Secure garbage and food sources: Properly secure trash cans with tight-fitting lids and store them in areas animals cannot access. Keep outdoor food sources, such as pet food or bird feeders, in sealed containers or bring them inside overnight to avoid attracting animals.
- Install deterrents: Use deterrents to discourage animals from returning. For example, motion-activated lights, sprinkler systems, or ultrasonic devices can make your property less attractive to critters. Some animals have specific deterrents that are effective against them, such as predator urine or specific smells that repel certain species.
- Maintain cleanliness and hygiene: Regularly clean your home and yard to reduce the availability of food and nesting materials. Remove debris, trim vegetation, and keep your property tidy. This makes it less appealing for animals to take up residence.
- Regular inspections: Conduct periodic inspections of your property, especially vulnerable areas like the attic or crawl spaces, to catch any signs of new infestations early. Promptly address any issues to prevent them from escalating.
Remember, while it’s important to address animal infestations, it’s equally essential to handle them humanely and in compliance with local regulations. If you’re unsure about the best approach or need assistance, consult with professionals in wildlife removal and animal control in your area.
Roof Punctures and Holes: Patching and Reinforcing Vulnerable Areas
Roof punctures and holes can occur due to various reasons, such as falling debris, animal activity, or weather damage. Promptly patching and reinforcing these vulnerable areas is essential to maintain the integrity of your roof. Here are some steps to help you with the process:
- Safety precautions: Before starting any repairs, prioritize safety. Ensure you have a stable ladder, wear appropriate safety gear (including non-slip shoes and gloves), and work on a clear day when the roof is dry and free from hazards.
- Assess the damage: Inspect the punctured or damaged area of the roof to determine the extent of the problem. Note the size and location of the hole or puncture. Assess if there is any underlying damage to the roof structure or other components.
- Clear debris: Remove any debris or loose materials around the damaged area. Use a broom or a brush to sweep away dirt, leaves, or loose shingle granules. This will help ensure proper adhesion of the patching materials.
- Temporary fix: If immediate protection is needed, you can use a tarp or heavy-duty plastic sheeting to cover the damaged area temporarily. Secure the covering tightly with nails or weights to prevent it from being blown away by the wind.
- Select the patching material: Choose an appropriate patching material based on the type of roofing material you have. For asphalt shingles, use roofing cement or roofing sealant. For metal roofs, use metal patches or roof repair tape. Consult with a roofing professional or the manufacturer’s guidelines for specific recommendations.
- Apply the patching material: Follow the instructions on the patching material and apply it according to the manufacturer’s recommendations. Typically, you will need to clean the area, apply the patching material directly onto the damaged area, and spread it evenly with a putty knife or trowel. Ensure the patch overlaps the damaged area and extends beyond it to create a secure seal.
- Reinforce the patch: Depending on the size and severity of the damage, you may need to reinforce the patch further. For example, you can place a patch of metal flashing over the patched area and secure it with roofing screws or nails. This provides additional strength and protection.
- Inspect and maintain: After the patching is complete, step back and inspect your work. Ensure the patch is secure, properly sealed, and blends in with the surrounding roofing material. Regularly inspect the patched area and the entire roof for any signs of new damage or leaks. Address any issues promptly to prevent further problems.
If you’re unsure about the repair process or have extensive damage, it’s advisable to consult a professional roofing contractor. They have the expertise and experience to handle roof repairs effectively and ensure long-lasting results. Regular roof maintenance, inspections, and timely repairs can help prolong the life of your roof and prevent more extensive damage in the future.
Storm Damage: Assessing and Restoring the Roof after Severe Weather
Severe weather, such as storms, can cause significant damage to roofs. It’s important to assess and restore your roof promptly to prevent further issues. Here’s a guide to help you with the process:
- Safety first: Before inspecting or repairing your roof, prioritize safety. Wait until the storm has passed and the weather conditions are favorable. Use a sturdy ladder, wear appropriate safety gear (including non-slip shoes and gloves), and be cautious of any potential hazards or electrical wires.
- Visual inspection: Conduct a visual inspection of your roof from the ground. Look for any obvious signs of damage, such as missing or damaged shingles, dented or displaced flashing, or fallen tree branches. Note the areas that require attention.
- Interior inspection: Check the interior of your home for signs of roof leaks. Look for water stains, discoloration, peeling paint, or dampness on ceilings, walls, and around windows. This will help identify areas where the roof may have been compromised.
- Document the damage: Take photos or videos of the damage for insurance purposes. It’s important to have visual evidence of the storm damage before initiating repairs.
- Address immediate concerns: If there are any areas where the roof is severely damaged, such as large holes or extensive leaks, take immediate action to prevent further water intrusion. Use tarps or heavy-duty plastic sheeting to cover the damaged areas temporarily. Secure the coverings tightly to protect your home until repairs can be made.
- Contact your insurance company: Notify your insurance company about the storm damage and provide them with the documentation and evidence you have collected. They will guide you through the claims process and provide instructions for repairs.
- Hire a professional roofing contractor: Unless you have experience in roofing repairs, it’s best to hire a professional roofing contractor for the assessment and restoration. Look for a reputable and licensed contractor with experience in storm damage repairs. They will have the expertise and equipment to safely and effectively restore your roof.
- Roof repair and restoration: Work with your roofing contractor to develop a plan for repairing or replacing damaged roofing materials. This may involve replacing missing or damaged shingles, repairing or replacing flashing, or addressing any structural damage. The contractor will follow industry best practices and ensure that the repairs are done correctly.
- Ongoing maintenance: After the storm damage has been addressed, continue to perform regular roof maintenance. Inspect your roof periodically for any signs of new damage or leaks. Clear out gutters and downspouts to prevent water accumulation, and trim overhanging branches to minimize the risk of future damage.
Remember, safety should always be a priority, and if you’re uncomfortable with the inspection or repair process, it’s best to seek professional help. Working with a qualified roofing contractor will ensure that your roof is restored properly, protecting your home from further damage.
Roof Sagging: Identifying Structural Issues and Seeking Professional Help
Roof sagging is a serious issue that requires immediate attention as it indicates potential structural problems with your roof. It’s crucial to identify the cause of the sagging and seek professional help to assess and address the issue. Here are some steps to follow:
- Safety first: If you notice roof sagging, prioritize safety. Keep away from the affected area and avoid going onto the roof. The structural integrity may be compromised, and it’s best to leave the inspection and repair to professionals.
- Signs of roof sagging: Look for signs of roof sagging from the ground or inside your home. These signs may include visible dips or curves in the roofline, uneven or bowed roof decking, cracked or sagging ceiling materials, doors and windows that don’t close properly, or noticeable gaps between walls and the roofline.
- Document the issue: Take photos or videos of the sagging for documentation purposes. This will be useful when consulting with professionals and filing insurance claims.
- Consult a structural engineer or roofing professional: Contact a qualified structural engineer or a reputable roofing professional who specializes in addressing structural issues. They have the expertise and knowledge to assess the extent of the problem and recommend appropriate solutions.
- Professional inspection: Arrange for a professional inspection of your roof by the structural engineer or roofing professional. They will examine the entire roof system, including the framing, trusses, rafters, and supports. They may also assess the foundation and other structural components of your home.
- Identify the cause: The professional will determine the cause of the roof sagging. It could be due to issues such as inadequate or damaged support beams, excessive weight on the roof, water damage, poor construction, or other structural problems. Identifying the cause is crucial to implementing the correct repair solution.
- Develop a repair plan: Based on the inspection findings, the professional will develop a repair plan tailored to your specific situation. This may involve reinforcing or replacing damaged structural components, adding additional supports, or in severe cases, replacing the entire roof.
- Follow professional recommendations: Follow the recommendations provided by the structural engineer or roofing professional. They will guide you on the necessary repairs or replacements to restore the structural integrity of your roof. It’s important to address the issue promptly to prevent further damage or collapse.
- Seek insurance coverage: Contact your insurance company to inform them about the roof sagging issue and provide them with the documentation and professional assessment. They will guide you through the claims process and provide assistance with the necessary repairs.
Remember, roof sagging is a complex issue that requires professional expertise. Attempting to repair or address it yourself can be dangerous and may lead to further damage. Seek professional help to ensure the safety and structural stability of your roof and home.
Gutter Problems: Maintaining and Repairing Clogged or Damaged Gutters
Maintaining and repairing your gutters is crucial for proper water drainage and protecting your home from water damage. Here are some steps to help you address clogged or damaged gutters:
- Safety precautions: Before starting any gutter maintenance or repair work, prioritize safety. Use a sturdy ladder, wear non-slip shoes and gloves, and ensure the ladder is on stable ground. Be cautious of overhead power lines and take necessary precautions.
- Clear debris: Remove leaves, twigs, and other debris from the gutters. Start at the downspouts and work your way along the gutters, using a small garden trowel or scoop to scoop out the debris. Dispose of the debris in a bag or compost pile.
- Unclog downspouts: If the downspouts are clogged, use a plumber’s snake or a garden hose with a high-pressure nozzle to dislodge the blockage. Alternatively, you can remove the downspout and clean it separately.
- Check for leaks: Inspect the gutters for leaks or holes. Look for signs of water dripping or streaks along the gutter channels. Use a garden hose to simulate rainfall and observe if any water leaks out of the gutters. Mark the areas that need repair.
- Repair leaks: For small leaks or holes, use a gutter sealant or silicone caulk to patch the damaged area. Clean the area thoroughly and apply the sealant according to the manufacturer’s instructions. For larger or more severe damage, consider replacing the affected section of the gutter.
- Ensure proper slope: Check that the gutters have a slight slope towards the downspouts. This allows water to flow freely and prevents pooling. Use a level to ensure the gutters have the appropriate slope and make adjustments if necessary.
- Secure loose gutters: Inspect the gutter brackets or hangers and tighten any loose screws or fasteners. Make sure the gutters are securely attached to the fascia board or the roofline.
- Install gutter guards: Consider installing gutter guards or screens to prevent debris from entering the gutters. These can help reduce the frequency of gutter cleaning and minimize clogging.
- Regular maintenance: Schedule regular maintenance to keep your gutters in good condition. Clean them at least twice a year, in the spring and fall, or more frequently if you have trees near your home that shed leaves frequently. Inspect the gutters after storms to ensure they are free from debris and damage.
If you’re unsure about gutter maintenance or repairs, or if you have extensive damage, it’s advisable to consult with a professional gutter cleaning and repair service. They have the expertise and equipment to handle gutter issues effectively and safely.
Remember, properly maintained gutters help protect your home’s foundation, prevent water damage, and ensure efficient water drainage. Regular maintenance and prompt repairs will help extend the lifespan of your gutters and keep them functioning effectively.
Mold and Mildew Growth: Addressing Moisture Issues and Preventing Mold
Mold and mildew growth can be a serious problem and should be addressed promptly to maintain a healthy living environment. Here are steps to help you address moisture issues and prevent mold growth:
- Identify and address the source of moisture: Mold thrives in moist environments, so it’s crucial to identify and address the source of moisture that is promoting its growth. Common sources include leaks, high humidity, condensation, or water intrusion from the roof or plumbing. Repair any leaks and address the underlying issue to prevent further moisture accumulation.
- Dry wet areas immediately: If you notice any areas that are damp or wet, dry them immediately. Use towels, fans, or dehumidifiers to facilitate the drying process. Ensure proper ventilation to help eliminate excess moisture.
- Improve ventilation: Proper ventilation is essential in preventing mold growth. Ensure that your home has adequate airflow by using exhaust fans in bathrooms, kitchens, and other areas prone to moisture. Open windows or use air conditioning and dehumidifiers to maintain optimal humidity levels.
- Clean and disinfect affected areas: If you have mold or mildew growth, clean and disinfect the affected areas. Use a mixture of water and mild detergent to scrub the surface and remove visible mold. For non-porous surfaces, you can also use a solution of bleach and water (1 part bleach to 10 parts water) to kill and disinfect the mold. Wear gloves and a mask to protect yourself during the cleaning process.
- Remove and replace porous materials if necessary: In some cases, mold growth may penetrate porous materials such as drywall or carpet. If these materials are extensively affected and cannot be thoroughly cleaned, it may be necessary to remove and replace them to eliminate the mold completely.
- Monitor humidity levels: Regularly monitor the humidity levels in your home. Ideally, indoor humidity should be kept below 60%. Use a hygrometer to measure humidity and take necessary steps to reduce it if it exceeds the recommended levels. Dehumidifiers can help in moisture control, especially in basements or areas with persistent humidity issues.
- Insulate and seal: Proper insulation and sealing of your home can help prevent condensation and moisture buildup. Insulate pipes, windows, and walls to reduce the likelihood of cold surfaces that can cause condensation. Seal gaps and cracks to prevent water intrusion and air leaks that can lead to moisture problems.
- Regular maintenance: Perform regular maintenance tasks to prevent moisture issues. Clean and inspect gutters and downspouts to ensure proper water drainage away from your home. Check for leaks in plumbing or roof areas and repair them promptly. Maintain proper ventilation in your home by regularly cleaning and replacing air filters in HVAC systems.
- Consult professionals: If you have a severe mold problem or are unsure about how to address it effectively, it’s best to consult with professionals experienced in mold remediation. They can assess the situation, provide appropriate solutions, and ensure the safe and effective removal of mold.
Remember, mold growth can have detrimental effects on your health and property. It’s important to address moisture issues promptly and implement preventive measures to keep your home dry and mold-free.
Regular Roof Maintenance: Proactive Steps to Prevent Common Problems
Regular roof maintenance is essential to prevent common problems and extend the lifespan of your roof. Here are some proactive steps you can take:
- Inspect your roof: Perform visual inspections of your roof at least twice a year, preferably in the spring and fall. Look for signs of damage, such as missing or damaged shingles, cracked or deteriorated flashing, or areas of sagging. Check for signs of water leaks, such as stains or discoloration on ceilings or walls. Address any issues you find promptly.
- Clean gutters and downspouts: Regularly clean out your gutters and downspouts to ensure proper water drainage. Remove leaves, debris, and any other obstructions that can cause clogging. This will help prevent water backup, which can lead to roof leaks and water damage.
- Trim overhanging branches: Trim back any tree branches that overhang your roof. Overhanging branches can cause damage to your roof during storms or high winds. They can also drop leaves and debris onto the roof, leading to clogged gutters and potential moisture issues.
- Check for moss and algae: Keep an eye out for moss, algae, or other organic growth on your roof. These growths can trap moisture, leading to the deterioration of roofing materials. If you notice any growth, consider using a moss/algae treatment or contacting a professional roof cleaner to safely remove it.
- Insulate and ventilate: Adequate insulation and ventilation in your attic can help regulate temperature and humidity levels, reducing the risk of moisture buildup and ice dam formation. Ensure proper insulation is in place and that vents are clear of obstruction.
- Address attic ventilation: Check your attic ventilation to ensure it is functioning properly. Good attic ventilation helps prevent heat buildup, reduces the risk of moisture problems, and prolongs the life of your roof. Consult with a professional if you have concerns about your attic ventilation system.
- Maintain seals and flashings: Inspect the seals and flashings around chimneys, vents, skylights, and other roof penetrations. Look for signs of cracking, deterioration, or separation. Repair or replace any damaged seals or flashings to maintain a watertight seal.
- Remove debris: Regularly remove debris, such as leaves, twigs, and other debris that accumulates on your roof. Debris can hold moisture, leading to rot and damage to roofing materials. Use a soft-bristle broom or leaf blower to safely remove the debris.
- Hire professional inspections: Consider hiring a professional roofing contractor to perform regular inspections and maintenance. They have the expertise to identify potential issues and address them before they become major problems.
By following these proactive steps and staying vigilant with regular roof maintenance, you can identify and address potential issues early on, preventing costly repairs and extending the life of your roof.
Conclusion:
Regular roof maintenance is crucial for the longevity and integrity of your roof. By taking proactive steps such as inspecting your roof, cleaning gutters, trimming overhanging branches, and addressing issues promptly, you can prevent common problems and avoid costly repairs down the line. Don’t forget to keep an eye out for moss and algae growth, maintain seals and flashings, and ensure proper attic insulation and ventilation. And if you’re not comfortable doing it yourself, don’t hesitate to call in a professional. Remember, a well-maintained roof protects your home and gives you peace of mind, so invest a little time and effort into keeping it in great shape.
